ArcaScribe Quick Start: From Download to Your First Transcript Draft
This guide takes you from the download page to a transcript draft you can open in Microsoft Word. It covers every click along the way, including the one-time setup on your first launch.
Set aside about twenty minutes for setup — most of that is waiting for a download to finish while you do something else.
What You'll Need
- A Windows PC or a Mac. ArcaScribe runs on your own machine, so nothing is uploaded anywhere
- A recording of the proceeding — an audio or video file
- About 4 GB of free disk space for the program and the transcription model
- An internet connection for setup only. Once you're set up, transcription runs offline
Part 1: Install ArcaScribe
Download ArcaScribe for your computer
Go to the download page.
On Windows, click the Windows download button.
On Mac, click Mac (Apple Silicon) if your Mac has an M Series Apple Silicon chip. Choose Mac (Intel) for older Macs.
ArcaScribe runs locally on your machine, so your hardware matters. On Windows, an NVIDIA GPU or a modern Intel/AMD processor is recommended. On Mac, any Apple Silicon device (M1 or later) works well. For detailed specs and benchmarks, see system requirements.
The file will save to your Downloads folder.
Open the downloaded file
Double-click the installer in your Downloads folder.
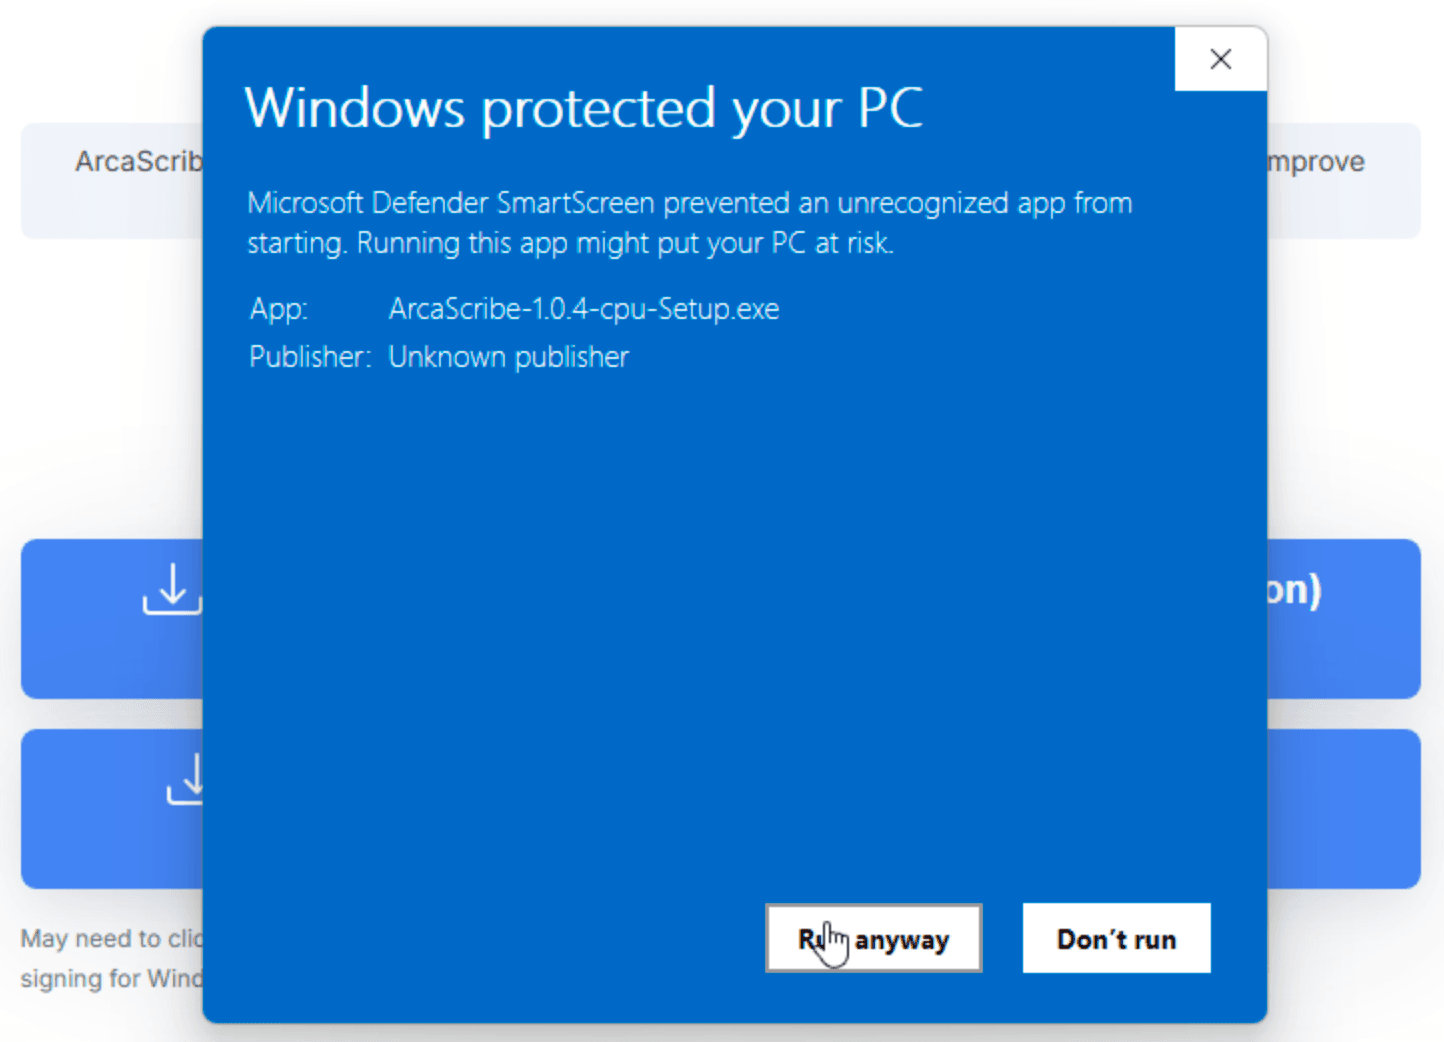
On Windows, if you see a blue box that says "Windows protected your PC," click More info, then Run anyway. Follow the installer prompts.
On Mac, drag the ArcaScribe icon into your Applications folder when the window appears.
Accept the license terms
Open ArcaScribe. The first time you run it, the ArcaScribe Software License Terms of Use appear.
Read through them, tick the agreement box, then click Continue.
Download the transcription model
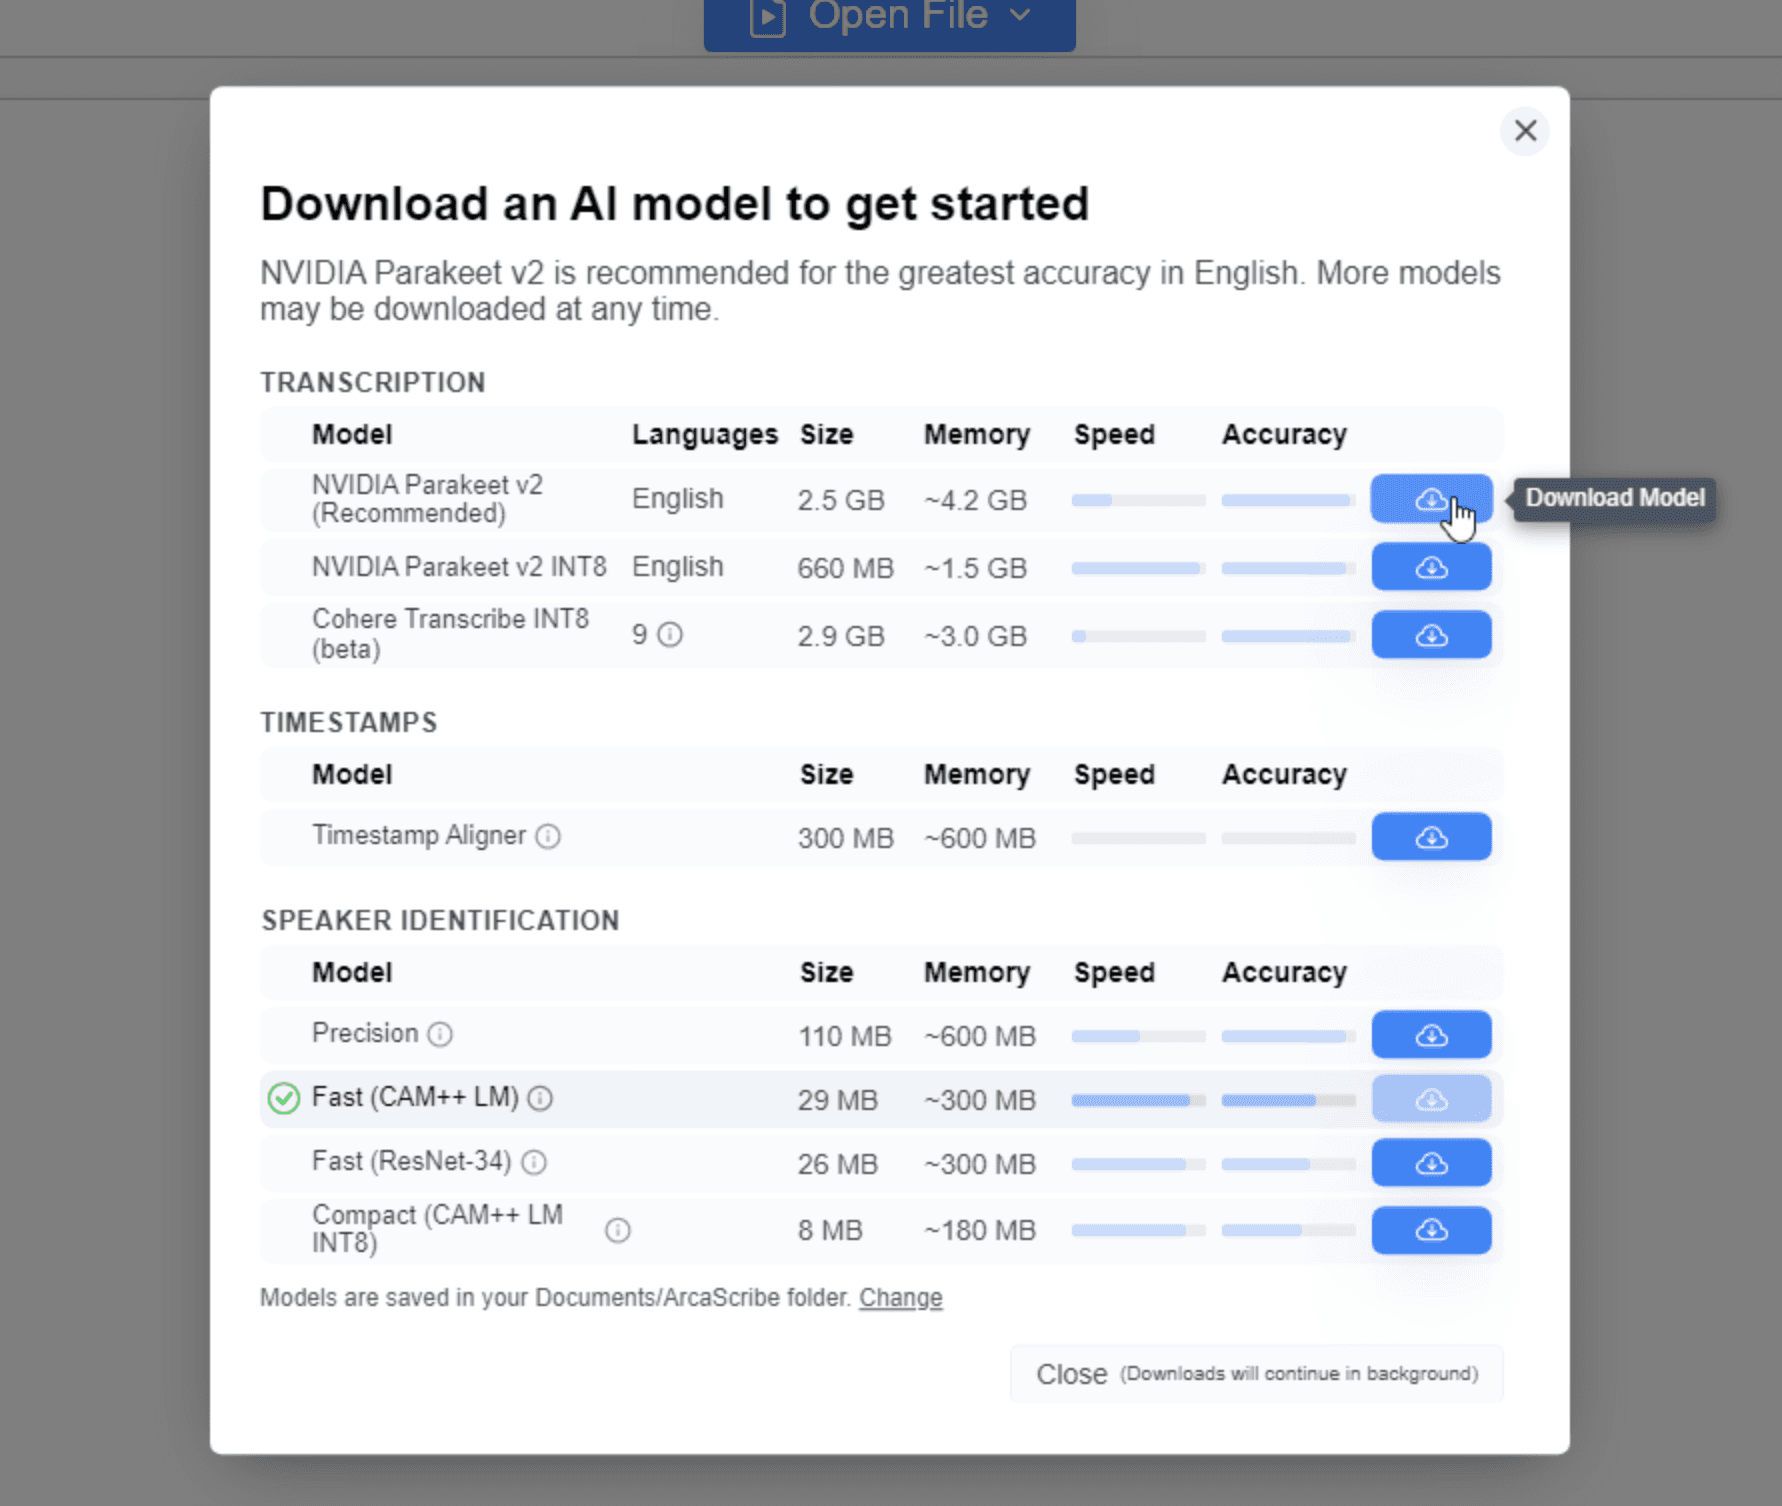
A window opens titled Download an AI model to get started.
This is the speech recognition model that produces your drafts. It runs on your machine, not on a server — which is why nothing you transcribe leaves your device. You download it once.
Under Transcription, find NVIDIA Parakeet v2 and click its Download button. It's a large file, so this takes a while depending on your connection. You can click Close and carry on — the download continues in the background.
Models are saved in your Documents/ArcaScribe folder.
Once the model has finished downloading, ArcaScribe transcribes entirely on your own machine. You can disconnect from the internet and keep working.
Setup is complete. Everything from here is what you'll do for each new recording.
Part 2: Open your recording
Open your recording in ArcaScribe
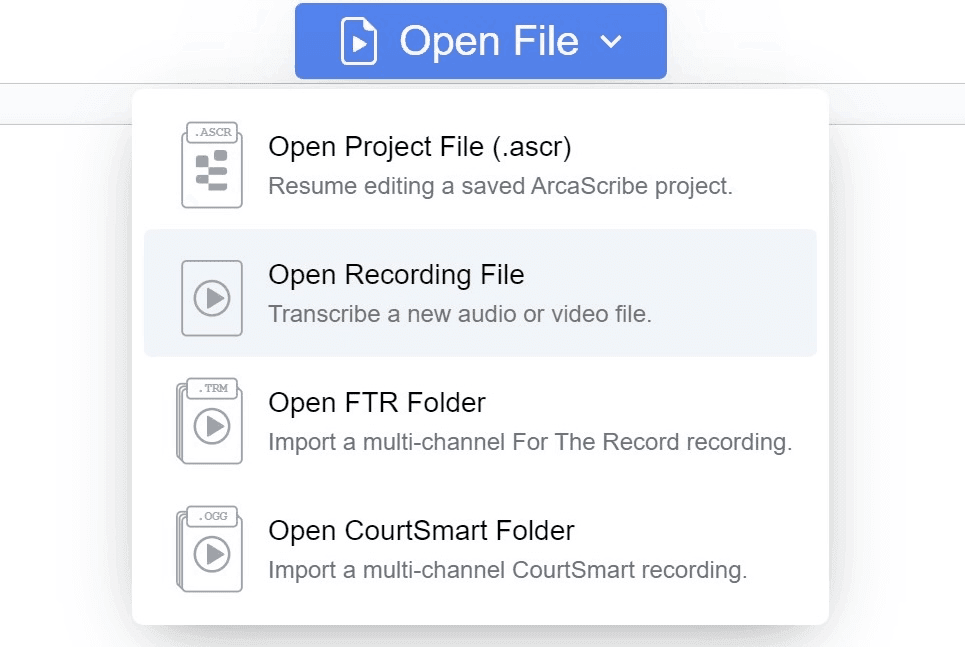
At the top of the ArcaScribe window, click the blue Open File button. The menu that appears has an option for each kind of recording:
- An ordinary audio or video file (WAV, MP3, M4A, MP4 and the like) — choose Open Recording File, then select your file and click Open.
- A Liberty .dcr file — export it to WAV in Liberty Player first, then choose Open Recording File. See how to convert Liberty files.
- An FTR folder of .trm segments — choose Open FTR Folder, and ArcaScribe joins them into one recording. See the FTR guide.
- A CourtSmart Transcription Package of .ogg clips — choose Open CourtSmart Folder, and again ArcaScribe joins them. See the CourtSmart guide.
You can also drag an audio or video file straight onto the ArcaScribe window.
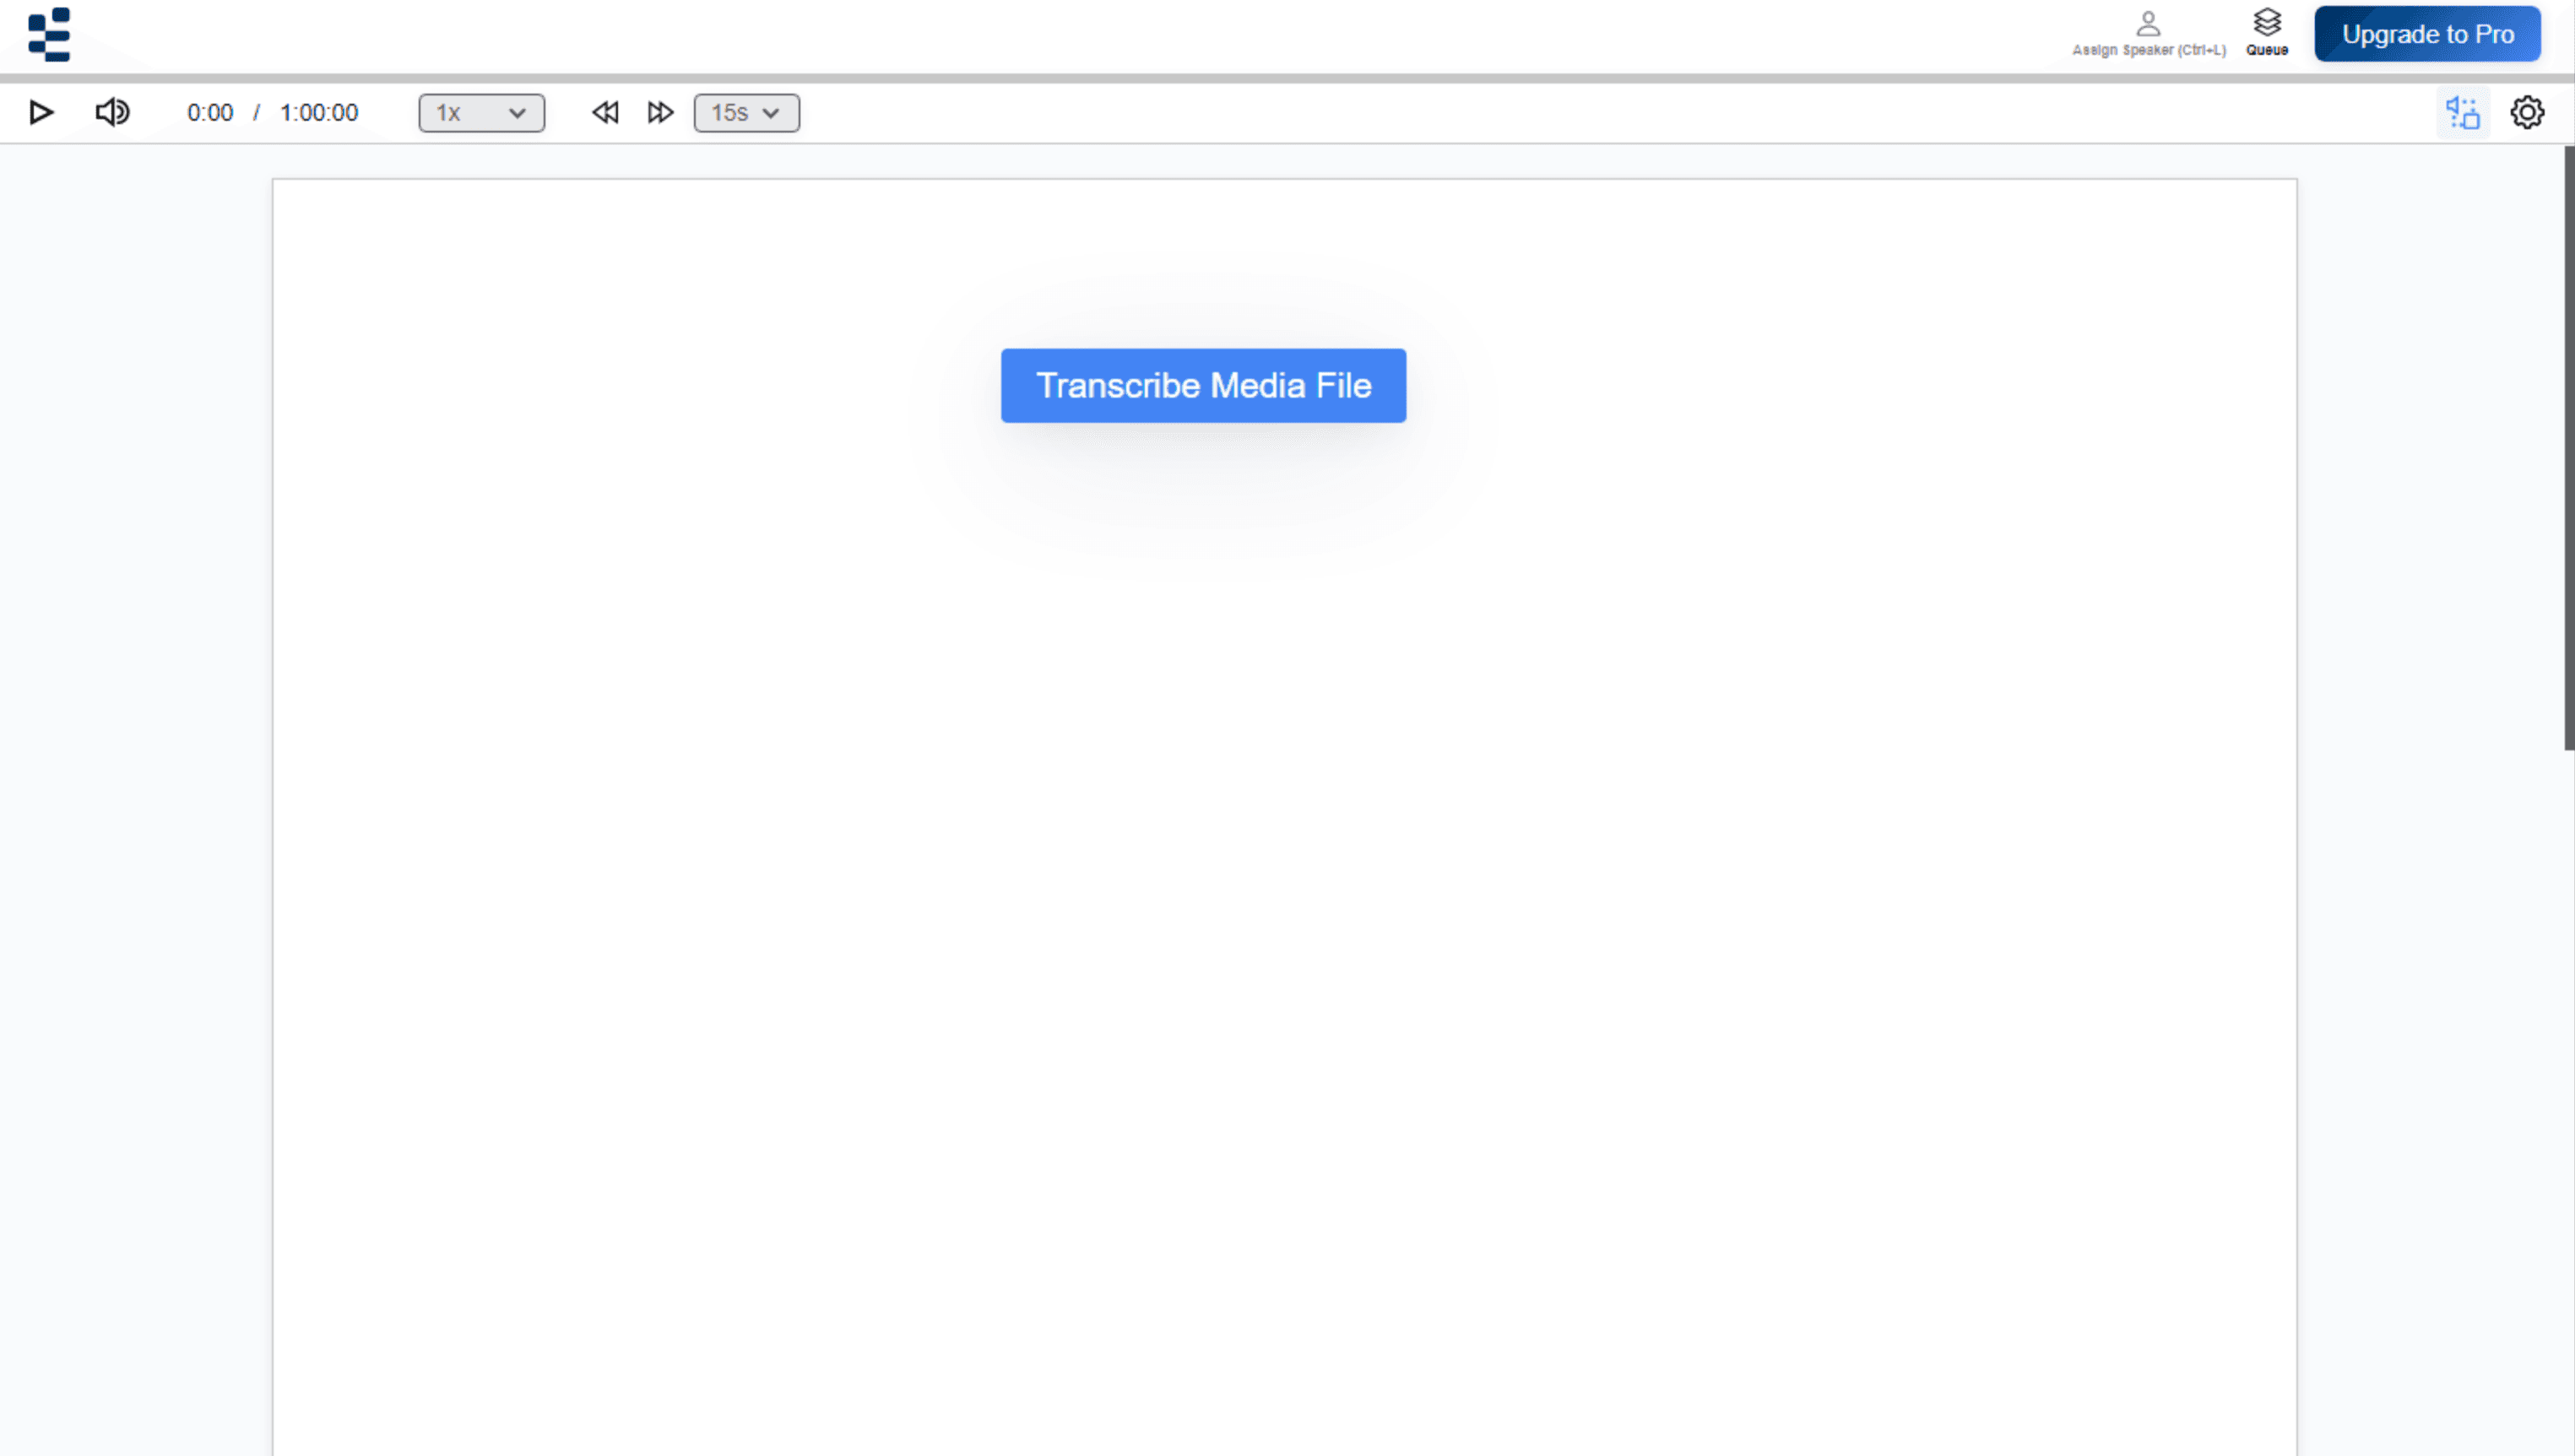
The recording opens in the player
The audio player appears across the top of the window, with playback controls and the total length of your recording. Below it, the transcript area is empty apart from a blue Transcribe Media File button.
Part 3: Generate the first draft
Set the language and spelling
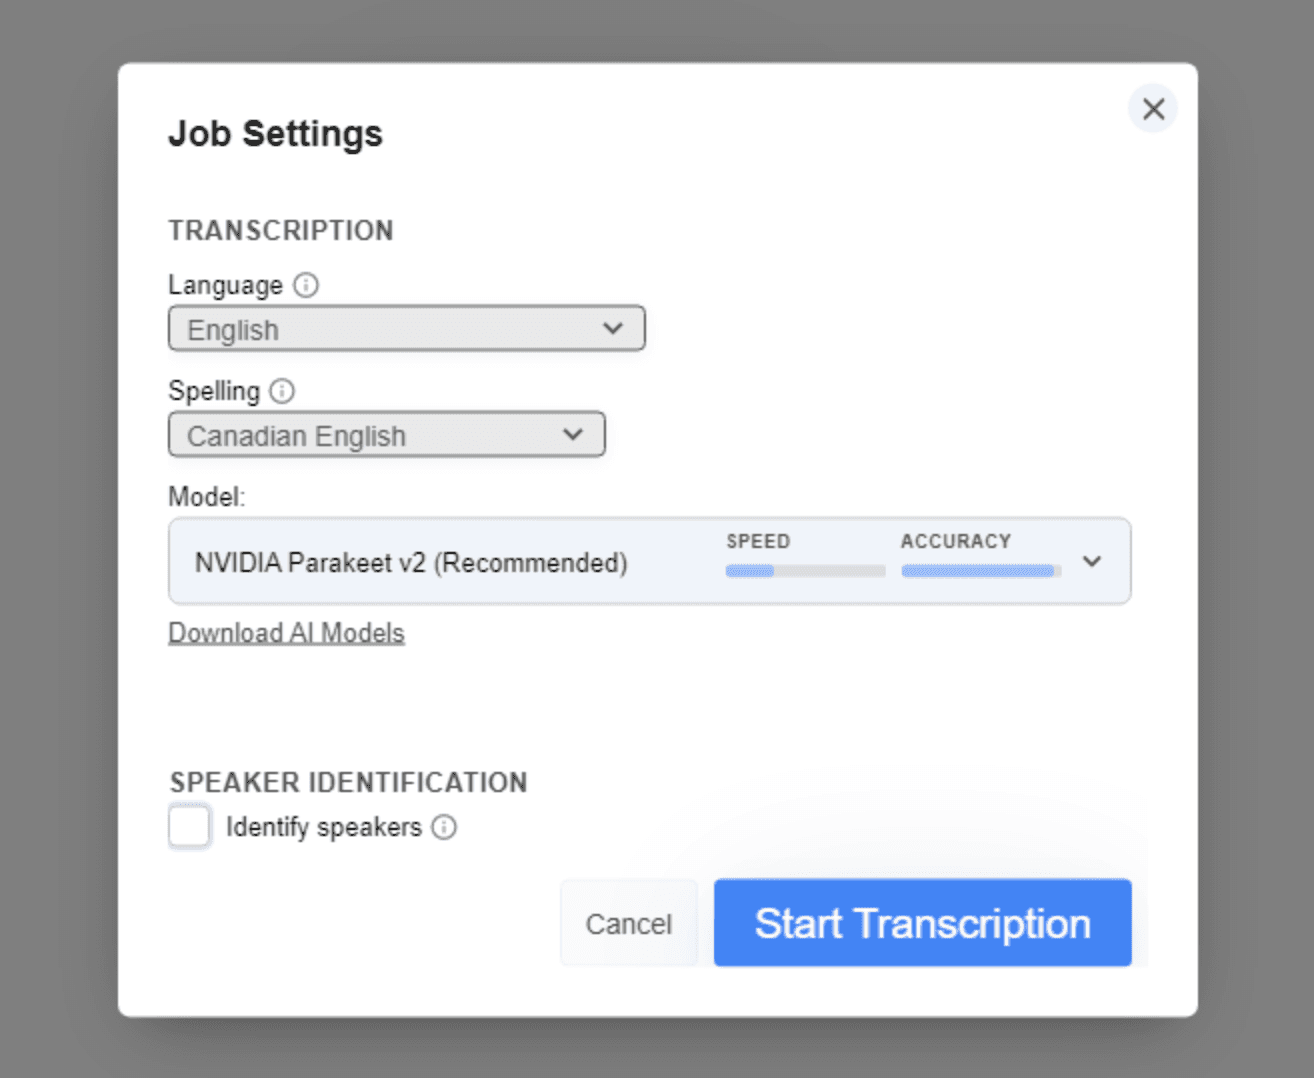
Click Transcribe Media File. A window opens called Job Settings.
Two settings at the top are worth a look:
- Language — leave this on English unless the proceeding was in another language.
- Spelling — defaults to US English. Set it to Canadian English for Canadian transcripts, or whichever variant your jurisdiction requires.
Confirm the model and speaker settings
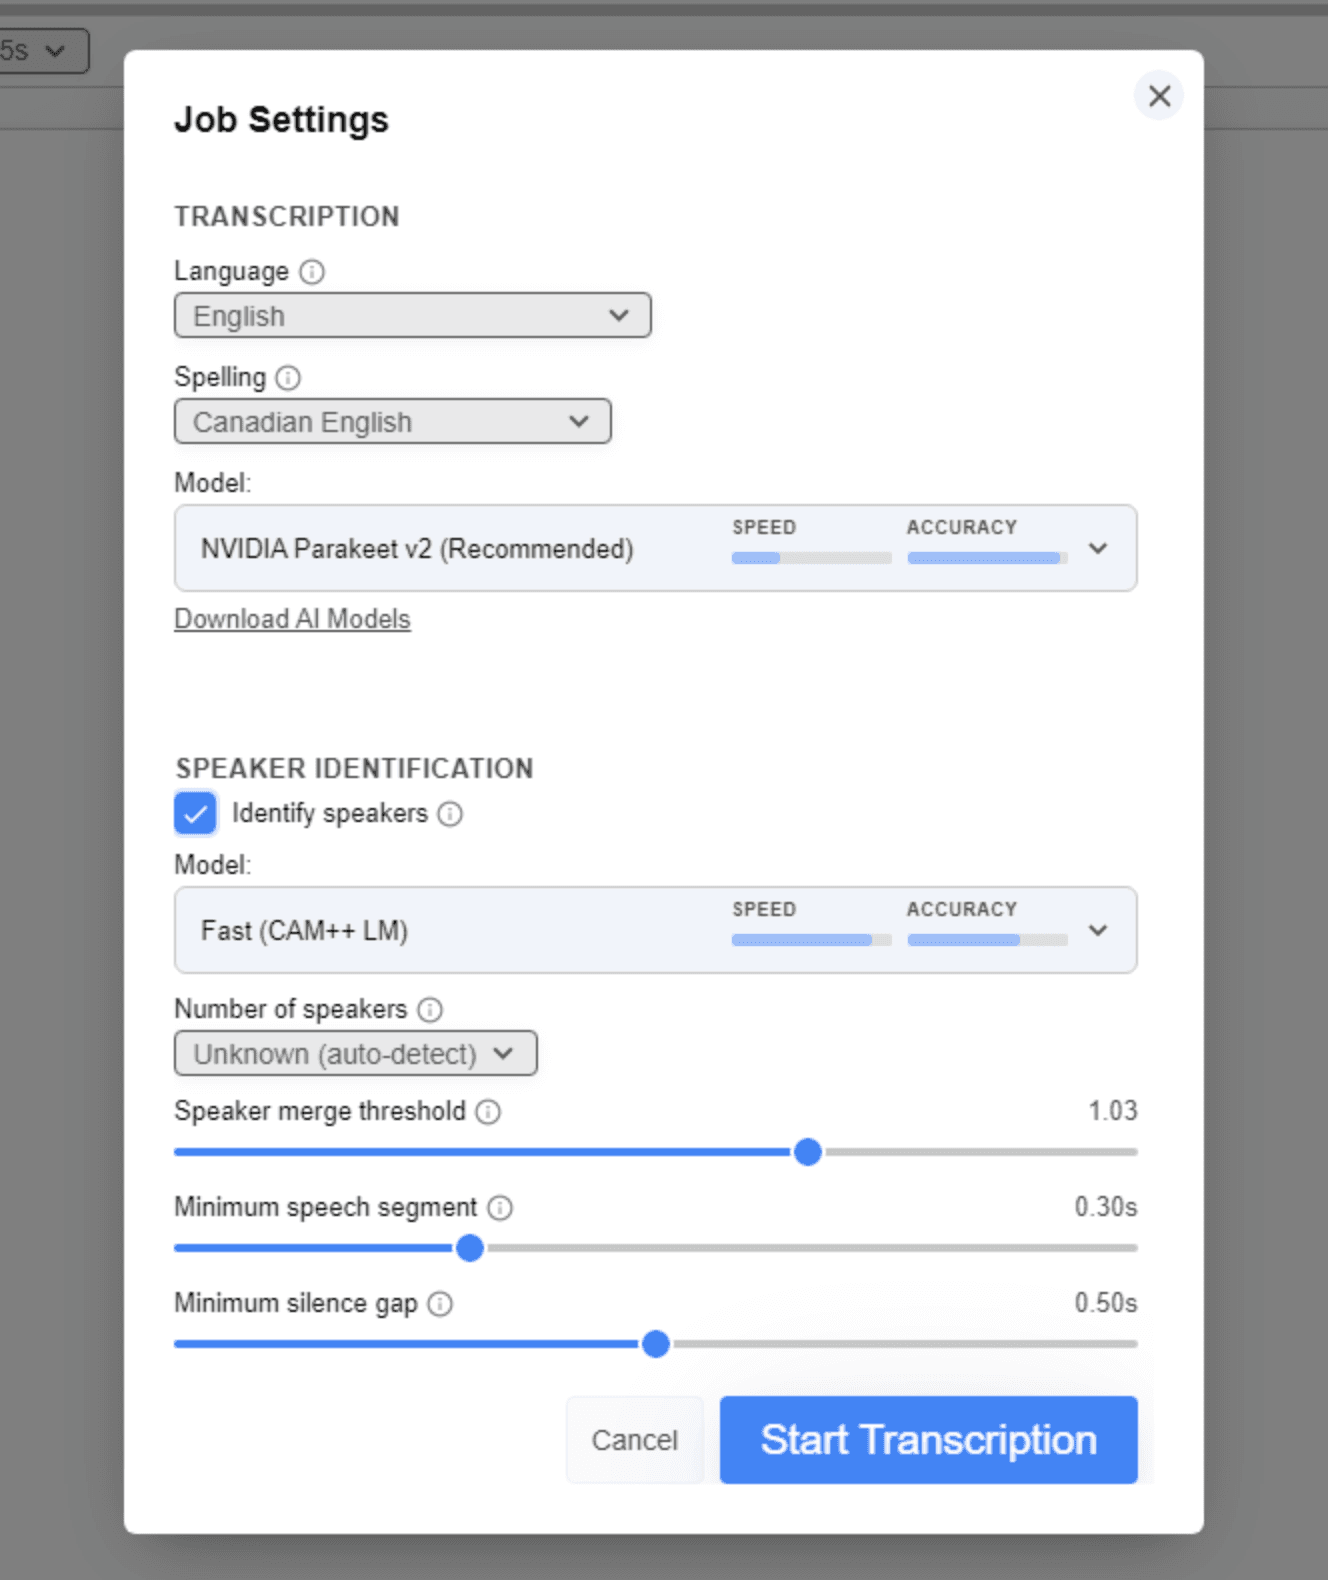
Below the language settings, the model you downloaded in Step 4 is already selected. Leave it as it is.
Speaker Identification is optional. Ticking Identify speakers labels who is speaking but adds a second pass. You can also assign speakers in the editor.
Start the transcription
Click Start Transcription.
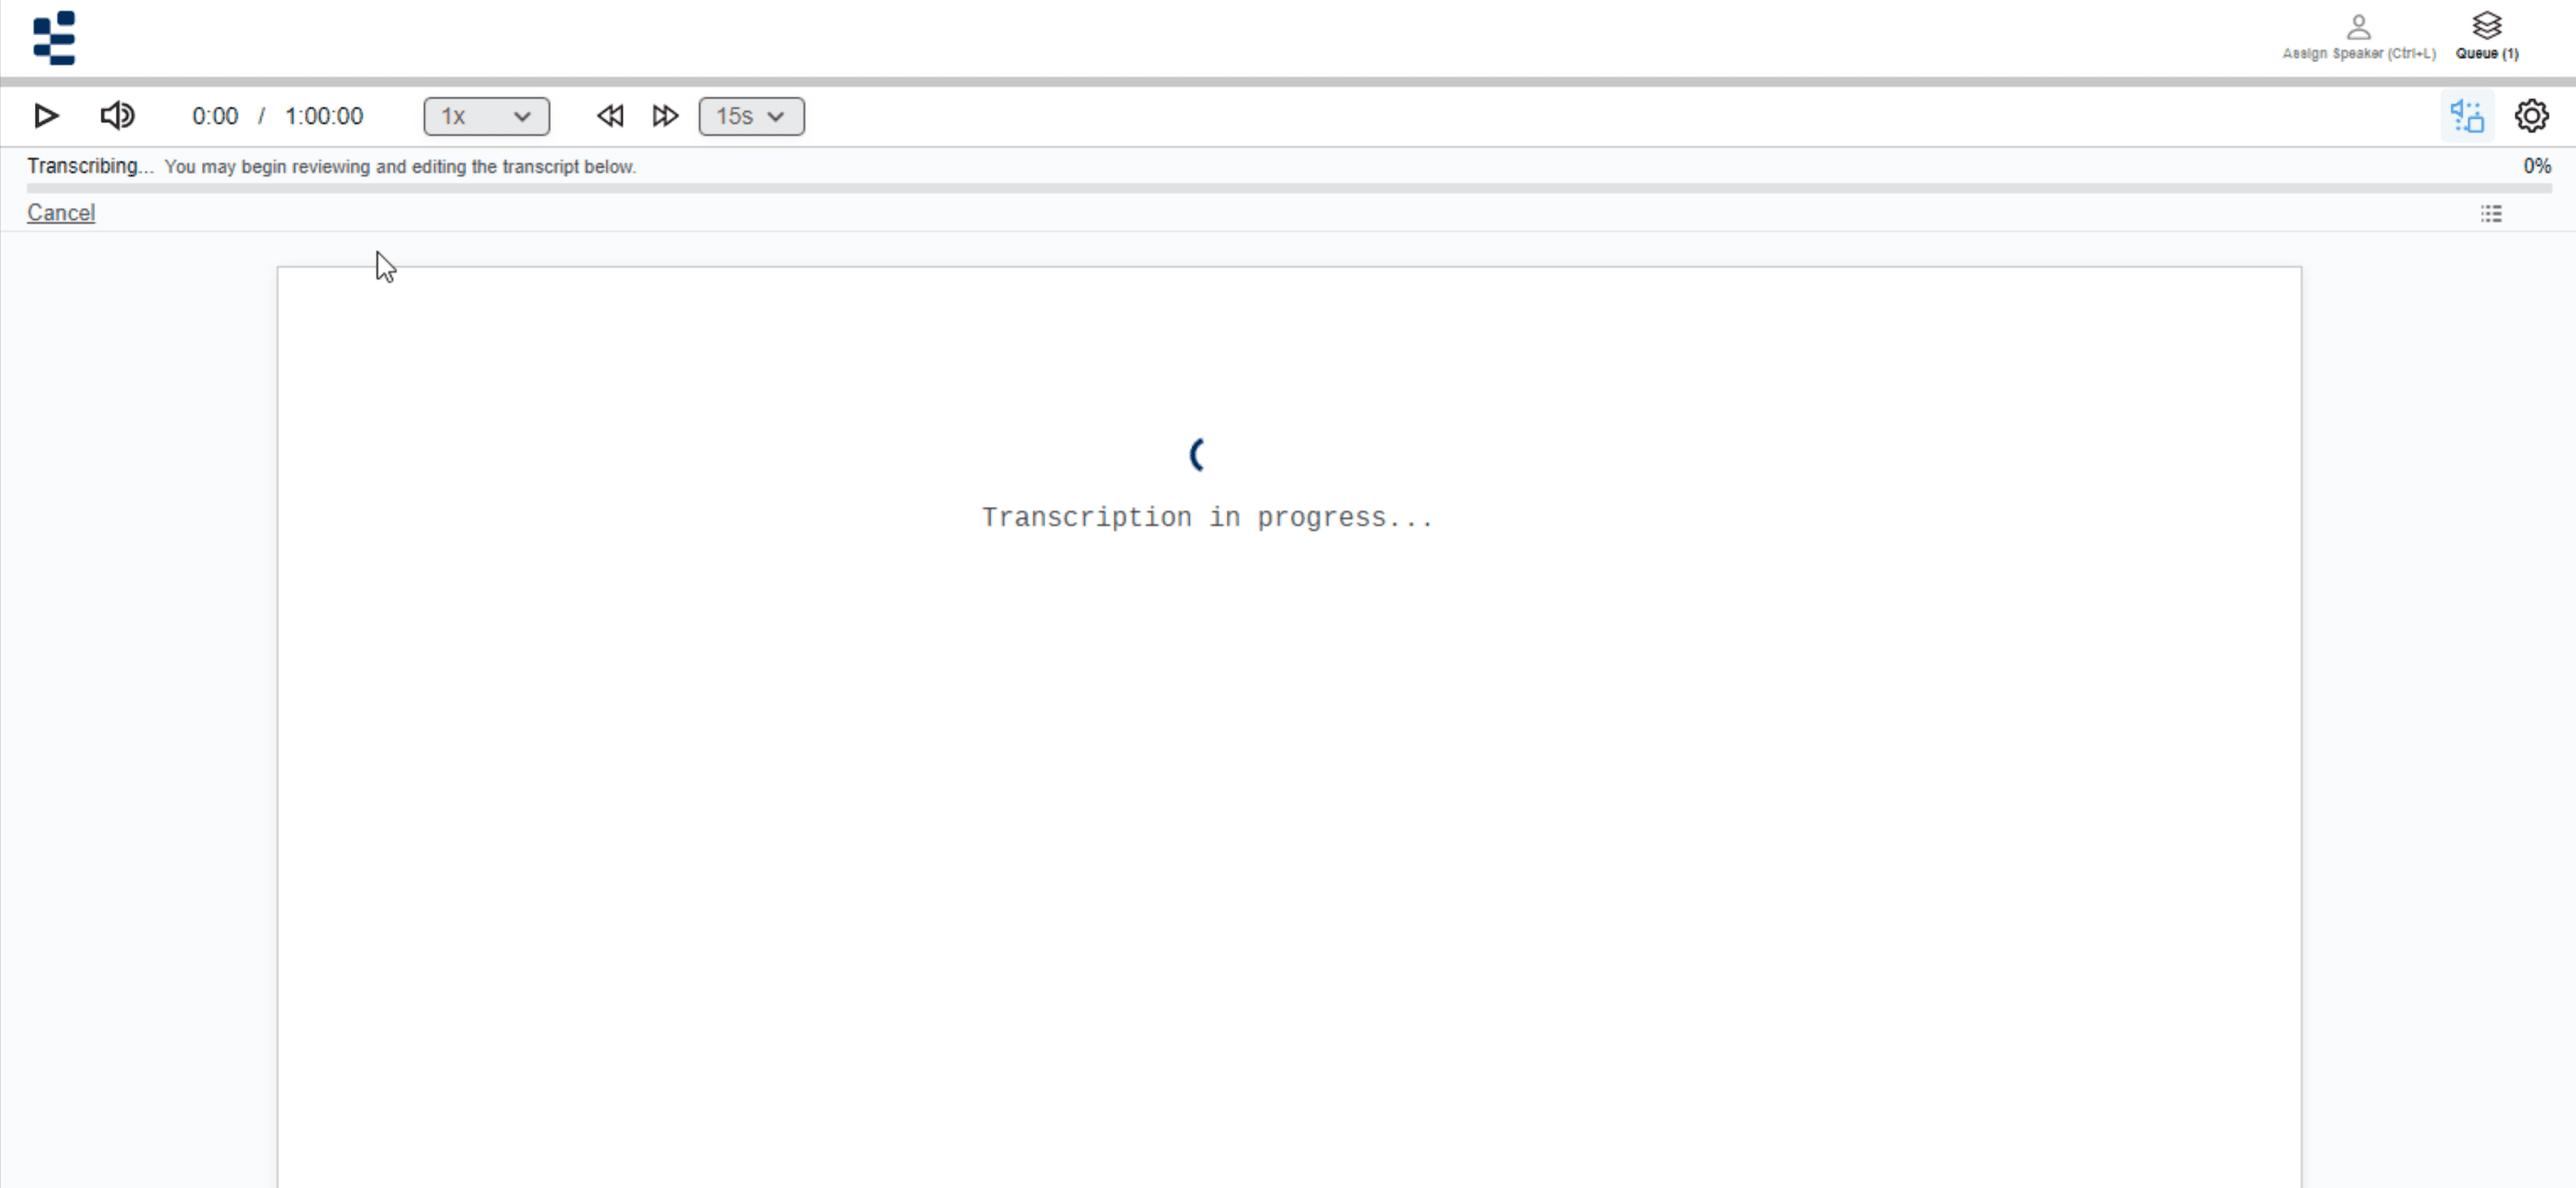
A progress bar appears below the audio player showing the percentage complete and an estimated time remaining. The transcript builds as the job runs and can be reviewed before it completes.
Processing time depends on the length of the recording and your hardware; longer proceedings can be left to run unattended. For expected timings on your own machine, see system requirements.
Part 4: Review and export the draft
Review in ArcaScribe or your word processor
Review the draft here, or export it now and work in your word processor — whichever suits your process.
To review here:
- Click anywhere in the text and the audio moves to that point.
- Assign Speaker in the top toolbar (
Ctrl+L,⌘Lon Mac) labels who is speaking. - File → Save stores a project file that reopens with the audio and your edits intact.
Export to Microsoft Word
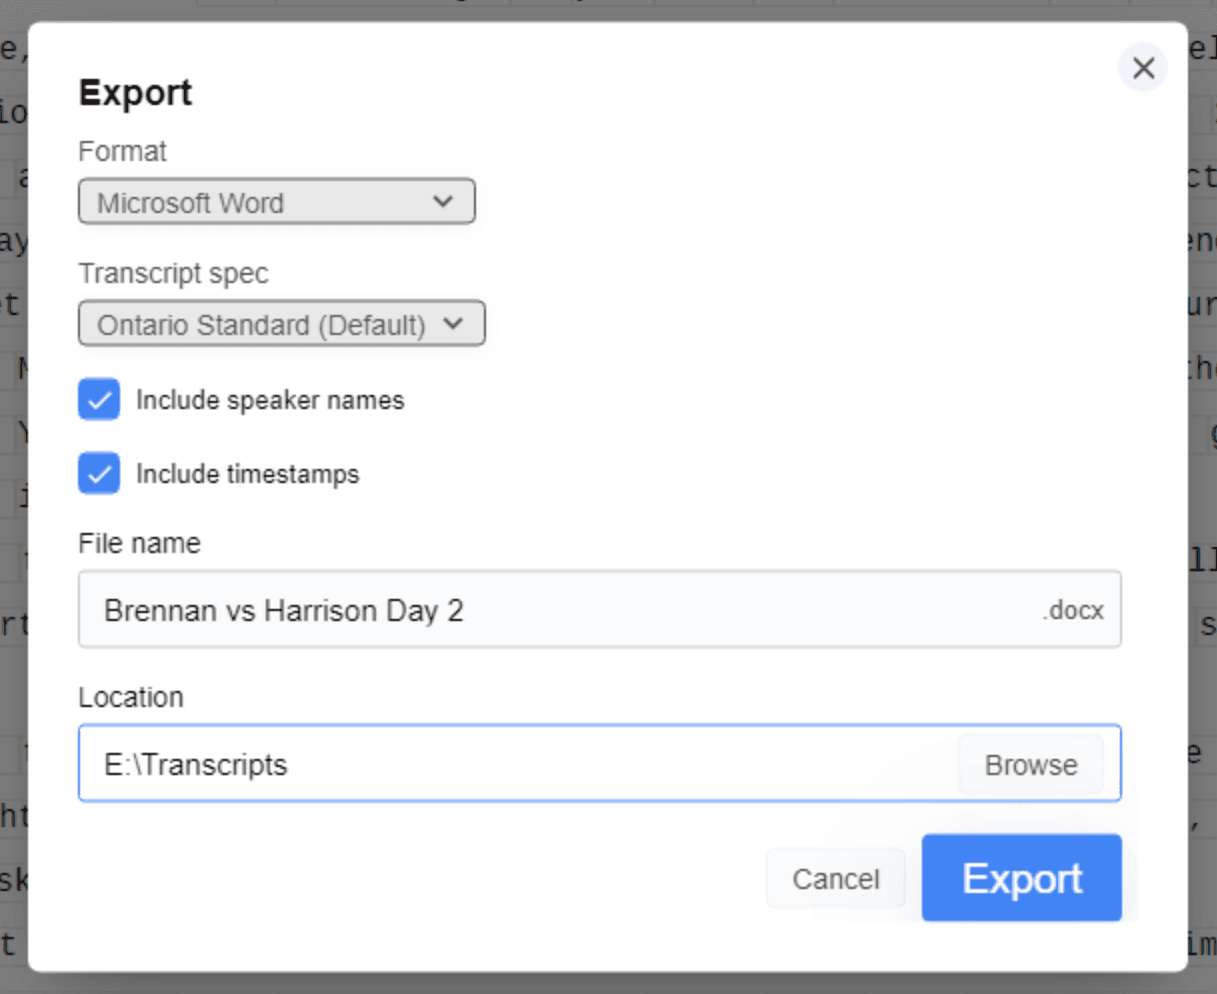
Click File → Export.
In the Export window:
- Set Format to Microsoft Word.
- Under Transcript spec, pick the standard you work to. This sets the font, margins, line numbering and page numbering.
- Tick Include speaker names if you want the speaker labels carried into the document.
- Check the File name and Location, then click Export.
The result is a .docx file formatted to the spec you selected.
Or copy the transcript to your clipboard
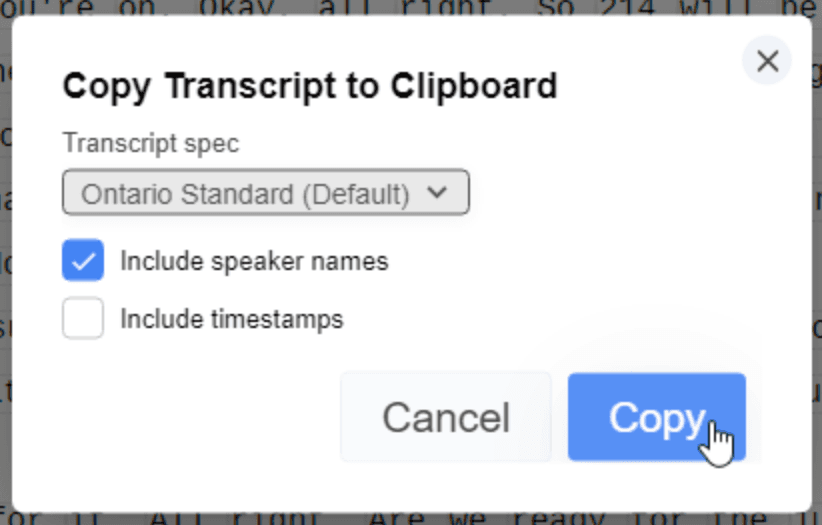
To paste the transcript into a document you already have open — your own template, for instance — use the clipboard instead.
Click File → Copy to Clipboard, choose your Transcript spec and whether to include speaker names, then click Copy.
From here it's proofing, formatting and certifying.
If you have questions or run into issues, please get in touch — we read every message.